


 Add users
 Remove users
 Download as Excel/CSV
Logged in as site_admin
View project as user:
Project Home and Design


Data Collection
Applications


Help & Information
AUD MOCAPID 16
 Project Revision History
 1) Customize MyCap User Privileges
Users with "Project Design and Setup" rights are able to enable and configure MyCap Tasks (Instruments) and schedules.
Users can also be given the "Manage MyCap Participants" user privilege in order to invite participants, send messages to individual participants, or
send announcements to all participants at once. If a user belongs to a Data Access Group, they will be able to invite and interact with only the participants assigned to their DAG.
2) Design your instruments in the Online Designer
The first instrument will be used to create the participant record and CANNOT be enabled as a MyCap task because a record must exist before a participant can join your project in the MyCap App.
After designing your instruments in the Online Designer, you can enable them for use in MyCap. You can add new instruments and enable them for MyCap any time.
After designing your instruments in the Online Designer, you can enable them for use in MyCap. You can add new instruments and enable them for MyCap any time.
Note: New date field ("Install Date") with annotation @MC-PARTICIPANT-JOINDATE and a new text field ("Code") with annotation @MC-PARTICIPANT-CODE are created on first instrument which will capture participants join date when participant joins from app and code when participant is created. These fields will be hidden and can be utilized while building a report.
3) Enable the use of a baseline date, if needed.
By default, all MyCap Tasks are scheduled based on the participant's install date, which is the date they join your project on their MyCap App.
If you wish to trigger any or all MyCap Tasks based on another date, such as a date of discharge or a clinic visit, you can configure
"Baseline Date Settings" from the Online Designer > MyCap Options.
The baseline date is not a REDCap Instrument; it is only a text field with date validation. Additionally, this field must be on an instrument that is not enabled for MyCap in case project users wish to enter or capture this date before the participant joins the project on their MyCap App. Once the text field exists (e.g., in your first instrument that is not enabled in MyCap), you can select that field while configuring the baseline settings.
The baseline date is not a REDCap Instrument; it is only a text field with date validation. Additionally, this field must be on an instrument that is not enabled for MyCap in case project users wish to enter or capture this date before the participant joins the project on their MyCap App. Once the text field exists (e.g., in your first instrument that is not enabled in MyCap), you can select that field while configuring the baseline settings.
4) Enable your instruments for MyCap in the Online Designer
All instruments in a project do not have to be enabled for MyCap. After clicking "Enable" for an instrument, you will be taken to the task setup page to configure the task for MyCap. These settings can be modified at any time during the course of your project.
Note: Instruments can be enabled as Surveys and MyCap Tasks (e.g., when not all participants are using MyCap).
5) Design the look and feel of MyCap from MyCap App Settings
You may access the "MyCap App Settings" page from either the Online Designer or via the MyCap step on the Project Setup page.
MyCap App Settings will allow you to configure the following:
- About pages describing your project. These pages appear when participants join the project in MyCap, and can be referenced from the MyCap App menu at any time.
- Contacts display project personnel or contact information that can be used to assist participants.
- Links provide constant access to important web-based resources such as videos and websites
- Theme allows you to select the color scheme of the app (Note: This ONLY works on iOS devices; Android devices default to the blue color scheme).
6) Visit MyCap Participant Management (on left-hand menu) to manage the MyCap Participant List, communications, and inviting participants to join your project:
- Participants – This tab allows users to enable a Custom Participant Label, determine which records to display in the MyCap Participant List, and obtain participant access information (e.g., a record-specific QR code or dynamic link) to join the project.
- Messages – This tab allows you to view messages from participants, send messages to individual participants, or make announcements to all participants. (Note: REDCap users do not receive an alert when participants send a message, so please check back often if you expect participants to contact you frequently.)
- App Synchronization Issues – This tab allows you to view any data that were not properly synced from the participants' mobile device to the REDCap project. Descriptive information is provided to help you understand why data were not synced. (Note: Synchronization issues cannot be automatically imported into your project, but the task data that would have synced properly is presented in a table that can be manually copied into a CSV, re-formatted, and manually imported into the project, if desired.)
7) Publish your MyCap Tasks and Design
After configuring all tasks, schedules, and the App Settings, use Publish new MyCap version from the MyCap App Settings or Online Designer pages. You only need to publish from ONE of these places.
8) Test your project on iOS and Android
After publishing your tasks and designs, you are ready to test your project. We recommend testing your project on an Android (v8.0+) and iOS (v11.0+) devices prior to onboarding participants.
We also recommend testing on any device type (phones, tablets) that participants might use.
Note: if you wish to see how tasks appear to participants, you can set all MyCap Task Schedules to "infinite", as this allows you to complete the tasks after making and published edits. Once the task appearance is satisfactory, setup the proper schedule and Publish new MyCap version.
Note: if you wish to see how tasks appear to participants, you can set all MyCap Task Schedules to "infinite", as this allows you to complete the tasks after making and published edits. Once the task appearance is satisfactory, setup the proper schedule and Publish new MyCap version.
9) Publish new MyCap version anytime you make changes.
You can make changes to your project at any time. However, any MyCap-related changes that are made must be 'published' before existing or new participants will see the update.
Participants will automatically see the updated version the next time they open their MyCap App. No action is required by participants.
Participants will automatically see the updated version the next time they open their MyCap App. No action is required by participants.
| Project status: Development |
Completed steps 1 of
9
|

Not started
|
Main project settings
Use longitudinal data collection with defined events??Saved!
Use the MyCap participant-facing mobile app?Learn more about MyCap
|
|
Not started
|
Design your data collection instruments & enable your surveys
Add or edit fields on your data collection instruments (survey and forms). This may be done by either using the Online Designer (online method) or by uploading a Data Dictionary (offline method). You may then enable your instruments to be used as surveys in the Online Designer. Quick links:
Download PDF of all instruments
OR
Download the current Data Dictionary
Go to
or
Explore the
Have you checked the
Check For Identifiers page to ensure all identifier fields have been tagged?
Learn how to use
|

In progress
|
Define your events and designate instruments for them
Create events for re-using data collection instruments and/or set up scheduling.
Go to
or
|

Optional
|
Enable optional modules and customizations
Repeating instruments?Saved!
Auto-numbering for records?Saved!
Scheduling module (longitudinal only)?Saved!
Randomization module?Saved!
Designate an email field for communications (including survey invitations and alerts)?Saved!
Twilio SMS and Voice Call services for surveys and alerts?Saved!
Mosio SMS services for surveys and alerts?Saved!
SendGrid Template email services for Alerts & Notifications?Saved!
|
|
Not started
|
Design the major components and user interface that your participants will see when they view the MyCap app on their mobile device. Create an About page containing a list of Links and Contacts, define a color scheme to theme the look of the MyCap mobile app, and customize when participants should receive a MyCap notification on days tasks are due.
Go to
or
|
|
Optional
|
Set up project bookmarks (optional)
You may create custom bookmarks to webpages that exist inside or outside of REDCap. These bookmarks will be seen as links on the left-hand project menu and can be accessed at any time by users who are given privileges to do so. Every project bookmark has custom settings that allow one to control its appearance and behavior.
Go to
|

Complete!
|
User Rights and Permissions
You may grant other users access to this project or edit the user privileges of current users on this project by navigating to the User Rights page. Additionally, if you wish to limit user access to certain records/responses for this project, you may want to use Data Access Groups, in which only users within a given Data Access Group can access records created by users within that group.
Go to
or
|
|
Not started
|
Test your project thoroughly
It is important to test the essential components of your project before moving it into production. Try creating a few test records and entering some data for each to ensure that your data collection instruments look and behave how you expect, especially branching logic and calculations. Then review your test data by creating reports and exporting your data to view in Excel or a statistical analysis package. If you have surveys, complete the surveys as if you were a participant by using the Public Survey Link or Participant List by sending a survey invitation to yourself. If other project modules will be used regularly, test them out a bit too. The best way to test your project is to use it as if you were entering real production data, and it is always helpful to have colleagues (especially team members) take a look at your project to get a fresh set of eyes looking at it.
|
|
Not started
|
Move your project to production status
Move the project to production status so that real data may be collected. Once in production, you will not be able to edit the project fields in real time anymore. However, you can make edits in Draft Mode, which will be auto-approved or else might need to be approved by a REDCap administrator before taking effect.
Go to
|
By default, new projects will use the 'classic' data collection format, which is the best option if all data collection instruments will only need to be used once for each record in the project. If some instruments need to be utilized repeatedly a specific *finite* number of times (e.g., using an instrument named 'Visit Data' over ten visits for the same subject), then 'longitudinal' data collection will likely be best. Additionally, the longitudinal format also allows one to utilize the scheduling module, if needed.
NOTE: If you are looking to repeat instruments *without limit* (i.e., ad hoc repetition), then you should instead use the 'repeating instruments and events' option seen on the Enable Optional Modules step on the Project Setup page. With longitudinal data collection, you must up front create all the events you wish to utilize for reusing an instrument more than once. However, with 'repeating instruments and events', you can repeat them a different number of times *without limit for each record*.
Are you sure you wish to disable longitudinal data collection? If you do so, please note that all your arms and events that you have created thus far will become hidden and will no longer be accessible. If you have collected some data already, only the data collected for your first event (on the first arm) will remain. If you wish to enable longitudinal data collection again, all your events and any data collected on them will return.
After creating data collection instruments in the steps below, you and other users in this project may enter data for those instruments. Additionally, you may enable any instrument as a survey and then collect data for that instrument from survey respondents. The only difference is who will be entering the data: project users, survey participants, or both. For surveys, you may utilize a Participant List for emailing your recipients and also to track who has taken your survey(s). And if your first data collection is enabled as a survey, then you may use a public survey link, which is a single link that can be emailed to all participants or even posted on a website.
Are you sure you wish to disable the usage of surveys in this project? If you do so, please note that all your surveys that you have created thus far will become hidden and will no longer be accessible. Your data collection instruments will remain just as they are, but they will simply not be able to be utilized as surveys. If you wish to enable the use of surveys in this project again, all your surveys that you had previously created will return.
This option will remove the ability for users to name new records manually and will instead provide a link that will auto-generate a new unique record name, which will be numerical and will increment from the highest numerical record value in the project. If no records exist, it will begin with '1'.
NOTICE: The option to enable auto-numbering has been disabled because your first data collection instrument has been enabled as a survey. In this case, auto-numbering is mandatory for the project.
The scheduling module can generate schedules for your project calendar that are auto-generated from project-defined events (e.g., visits, time-points). Scheduling is only available for projects using longitudinal data collection.
Randomization is a process that assigns participants/subjects by chance (rather than by choice) into specific groups, typically for clinical research and clinical trials. The randomization module in REDCap will help you implement a defined randomization model within your project, allowing you to randomize your subjects (i.e. records in your project). In this module, you first define the randomization model with various parameters. Based on the defined parameters, the module creates a template allocation table, which you can use to structure the randomization table you will import. The module also monitors the overall allocation progress and assignment of randomized subjects.
User privileges can be set to allow only certain users to be able to set up the randomization, perform the randomization, or view the allocation dashboard to view progress. If someone is given 'Randomize' privileges, they will be able to view and modify any existing data already collected for the randomization strata fields (if stratification is used) when they are performing the randomization, even if they do not specifically have form-level rights to view the form on which a strata field exists. Thus Randomize rights trumps form-level rights in this way, but only for the randomization strata fields.
User privileges can be set to allow only certain users to be able to set up the randomization, perform the randomization, or view the allocation dashboard to view progress. If someone is given 'Randomize' privileges, they will be able to view and modify any existing data already collected for the randomization strata fields (if stratification is used) when they are performing the randomization, even if they do not specifically have form-level rights to view the form on which a strata field exists. Thus Randomize rights trumps form-level rights in this way, but only for the randomization strata fields.
By enabling this feature, REDCap can direct specific email communications to the email address provided. This includes sending survey invitations, automated survey invitations, survey confirmation emails, and Alerts & Notifications. If a field is designated for that purpose, then any records in your project that have an email address captured for that particular field will have that email address show up as the participant's email address in the Participant List (unless an email address has already been entered for that participant in the Participant List directly).
Using the designated email address field can be especially valuable when your first data collection instrument is not enabled as a survey while one or more other instruments have been enabled as surveys. Since email addresses can only be entered into the Participant List directly for the first data collection instrument, the designated email field provides another opportunity to capture the email address of survey participants.
Please be aware that designating an email field means that survey responses can NEVER BE ANONYMOUS because of the fact that the participant's email address can be viewed on a data entry form, which means it is easy to identify the record/response to which the email address belongs.
NOTE: If the participant's email address has already been captured directly in the Participant List, then that email address will supersede the value of the email field here when survey invitations are sent to the participant. Also, if the email invitation field exists on multiple longitudinal events, on a repeating instrument, or on a repeating event, the field's value will be synchronized across all instances/events so that changing it in one location will change the value across all events/instances where the field appears.
Survey-specific email invitation field: While the email invitation field discussed here is a project-level setting, it is helpful to know that there also exists a survey-level email invitation field option that can be utilized for particular surveys in the project (whereas the project-level field would be applied to ALL surveys). A survey-specific email invitation field can be enabled for any given survey, in which you can designate any email field in your project to use for sending survey invitations for that particular survey. Thus, you can collect several email addresses (e.g., for a student, a parent, and a teacher) and utilize each email for a different survey in the project. Then you can send each person an invitation to their own survey, after which all the survey responses get stored as one single record in the project. See the 'Survey Settings' page in the Online Designer for this survey-level setting.
The Data Entry Trigger is an advanced feature. It provides a way for REDCap to trigger a call to a remote web address (URL), in which it will send a HTTP POST request to the specified URL whenever *any* record or survey response has been created or modified on *any* data collection instrument or survey in this project (it is *not* triggered by data imports - including API imports and Mobile App imports - but only by normal data entry on surveys and data entry forms). Its main purpose is for notifying other remote systems outside REDCap at the very moment a record/response is created or modified, whose purpose may be to trigger some kind of action by the remote website, such as making a call to the REDCap API.
In the HTTP Post request, the following parameters will be sent by REDCap in order to provide a context for the record that has just been created/modified:
In the HTTP Post request, the following parameters will be sent by REDCap in order to provide a context for the record that has just been created/modified:
• project_id - The unique ID number of the REDCap project (i.e. the 'pid' value found in the URL when accessing the project in REDCap).
• username - The username of the REDCap user that is triggering the Data Entry Trigger. Note: If it is triggered by a survey page (as opposed to a data entry form), then the username that will be reported will be '[survey respondent]'.
• instrument - The unique name of the current data collection instrument (all your project's unique instrument names can be found in column B in the data dictionary).
• record - The name of the record being created or modified, which is the record's value for the project's first field.
• redcap_event_name - The unique event name of the event for which the record was modified (for longitudinal projects only).
• redcap_data_access_group - The unique group name of the Data Access Group to which the record belongs (if the record belongs to a group).
• [instrument]_complete - The status of the record for this particular data collection instrument, in which the value will be 0, 1, or 2. For data entry forms, 0=Incomplete, 1=Unverified, 2=Complete. For surveys, 0=partial survey response and 2=completed survey response. This parameter's name will be the variable name of this particular instrument's status field, which is the name of the instrument + '_complete'.
• redcap_repeat_instance - The repeat instance number of the current instance of a repeating event OR repeating instrument. Note: This parameter is only sent in the request if the project contains repeating events/instruments *and* is currently saving a repeating event/instrument.
• redcap_repeat_instrument - The unique instrument name of the current repeating instrument being saved. Note: This parameter is only sent in the request if the project contains repeating instruments *and* is currently saving a repeating instrument. Also, this parameter will not be sent for repeating events (as opposed to repeating instruments).
• redcap_url - The base web address to REDCap (URL of REDCap's home page).
i.e., http://172.31.15.238/redcap/
i.e., http://172.31.15.238/redcap/
• project_url - The base web address to the current REDCap project (URL of its Project Home page).
i.e., http://172.31.15.238/redcap/redcap_v15.0.35/index.php?pid=XXXX
i.e., http://172.31.15.238/redcap/redcap_v15.0.35/index.php?pid=XXXX
NOTE: If the names of your records (i.e. the values of your first field) are considered identifiers (e.g., SSN, MRN, name), for security's sake it is highly recommended that you use an encrypted connection (i.e. SSL/HTTPS) for the URL you provide for the Data Entry Trigger.
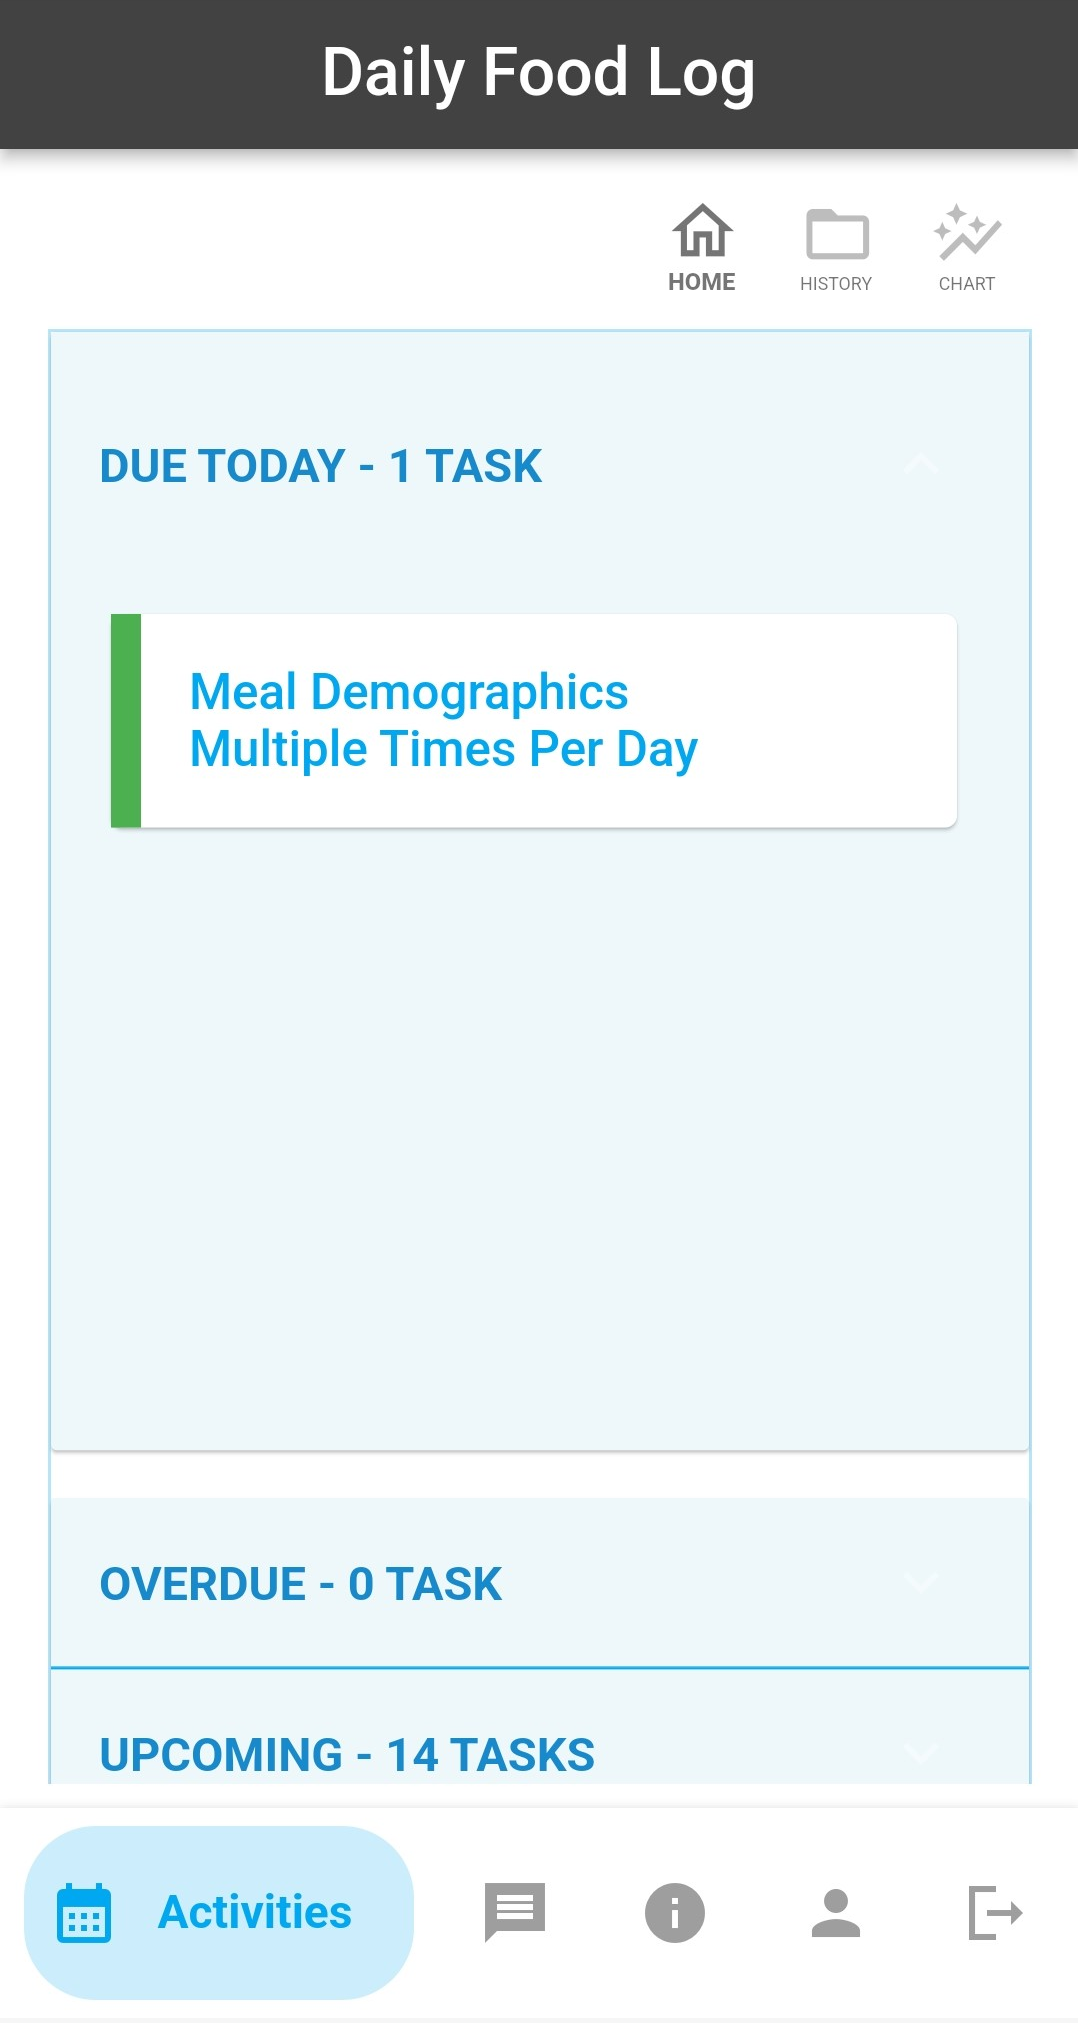
Take a test drive: View the MyCap app through the eyes of a participant.
Join a demo project using the MyCap mobile app
Join a demo project using the MyCap mobile app
MyCap is a participant-facing mobile application (on iOS and Android) used for data collection and the automated administration of active tasks
(activities performed by participants using mobile device sensors under semi-controlled conditions).
All data collected in the MyCap app are automatically sent back to the REDCap server as soon as internet connection is available (i.e., it can also be used for offline participant data collection).
MyCap is a no-code solution for research teams conducting longitudinally-designed projects or projects with frequent participant contact.
MyCap also facilitates participant engagement and retention by providing quick access to project staff and two-way communications (e.g., messaging and announcements) within the app.
MyCap is available on any iOS device (iOS v11.0+) and any Android device (Android v8.0+).
For more information about MyCap, check out the MyCap website,
publication,
resources, and a list of
MyCap use cases.
Prefer a detailed guide of instructions?
Read the MyCap Help document
Participants can join your project on the MyCap mobile app using a QR code or hyperlink that is unique to their record in your REDCap project.
A participant's record must already exist in the REDCap project in order for them to get a QR code or hyperlink.
The methods below will provide you with template language and directions for onboarding participants to your project. To obtain an individual participant's QR code or hyperlink after their record has been created in the project, see the MyCap Participant Management > MyCap Participant List. This project has been converted to the new MyCap app.
The methods below will provide you with template language and directions for onboarding participants to your project. To obtain an individual participant's QR code or hyperlink after their record has been created in the project, see the MyCap Participant Management > MyCap Participant List. This project has been converted to the new MyCap app.
Current limitations with MyCap: Several standard REDCap features are not supported by MyCap, partially due to the fact that the MyCap app intentionally keeps very little participant data
on the mobile device at a given time. The following REDCap features are not supported in the MyCap mobile app:
piping, smart variables, field embedding, special functions, calculated fields, and most action tags (@HIDDEN and all @MC- prefixed action tags *are* supported).
Branching logic is partially supported, in which
simple, single-statement branching logic (i.e., does not contain AND, OR, or special functions), such as
[field]='1', is supported.
Are you sure you wish to disable the usage of MyCap in this project? If so, please note that all your MyCap task settings and configuration that you have
created thus far will become hidden and will no longer be accessible. Your data collection instruments will remain just as they are, but
they will simply not be able to be utilized by MyCap. If you wish to enable the use of MyCap in this project again, all your MyCap tasks settings and configuration
that you had previously created will return.
 Have you checked the
| REDCap 15.0.35 - © 2026 Vanderbilt University - Cookie policy |